This tutorial is based on my 1991 LS400
Tools required :
Breaker bar
Socket wrench
A couple of extenstions
Torque wrench capable of reading at least 181 lbs
Sockets - 8mm, 10mm, 14mm, 17mm, 22mm, 10mm hex
Harmonic balancer remover
Parts replaced:
Timing belt
Water pump
No.1 idler pulley
No.2 idler pulley
Tensioner
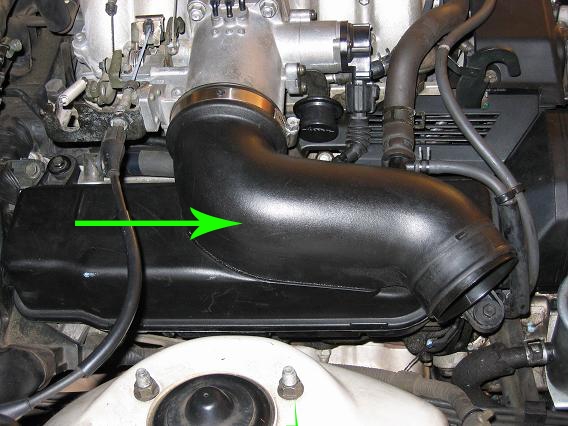
Remove air duct - (1) 10mm bolt:
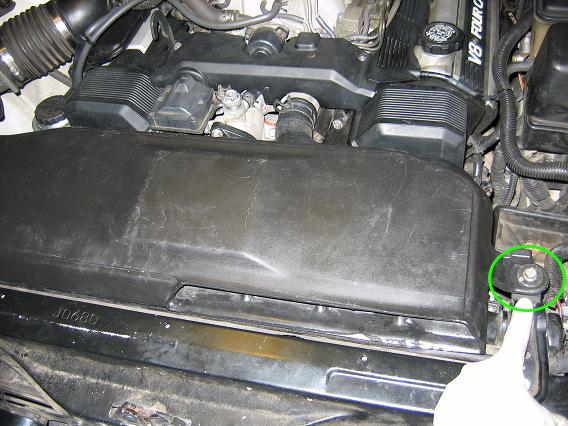
Take off dust cover, then unhook the clamp, (1) 10mm bolt then air filter housing:
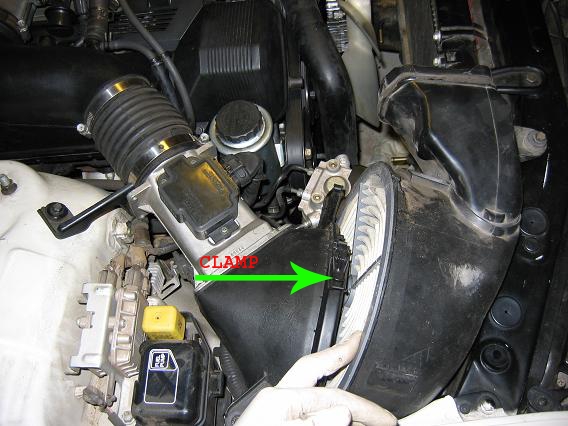
Disconnect the plug leading to the Mass Air Flow sensor from this and remove the 2 bolts and loosen clamp:
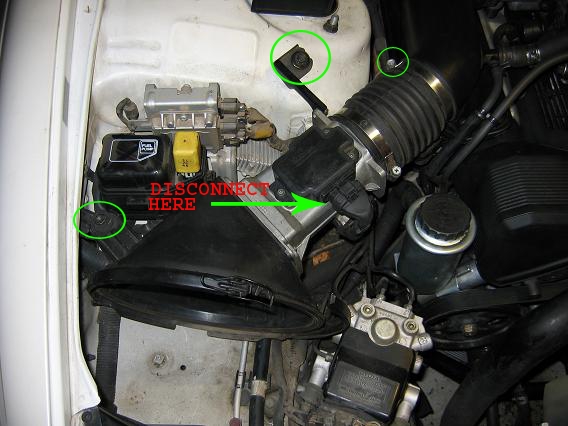
Remove those 2 hoses to the right, 2 bolts then loosen the clamp to the throttle body and remove throttle body cover and air cleaner assembly:
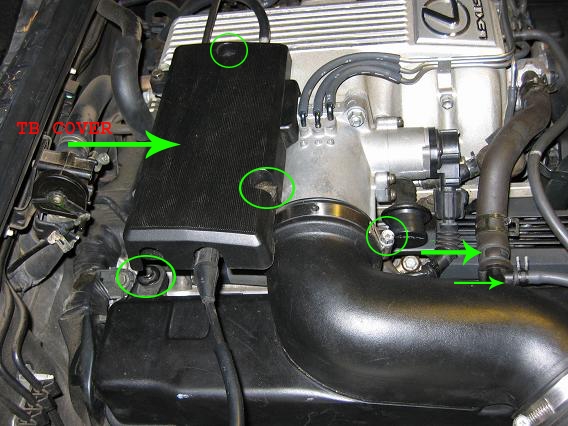
This is the assembly that you have to remove those 2 hoses, clamp, throttle body cover and 2 screws from. Once you have the rectangle cover (throttle body cover) from the picture above off, remove this assembly:
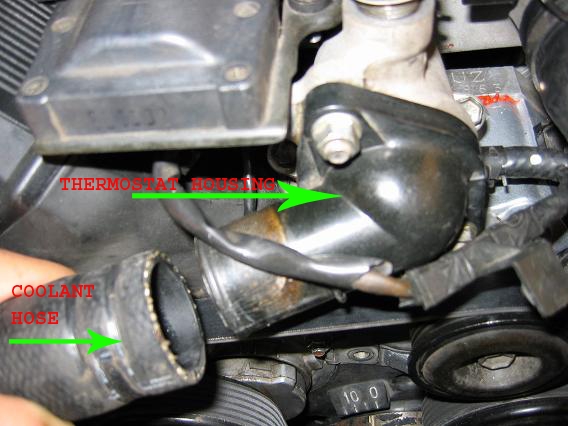
Drain radiator coolant from radiator before you proceed with this next step. Disconnect coolant hose from thermostat housing:
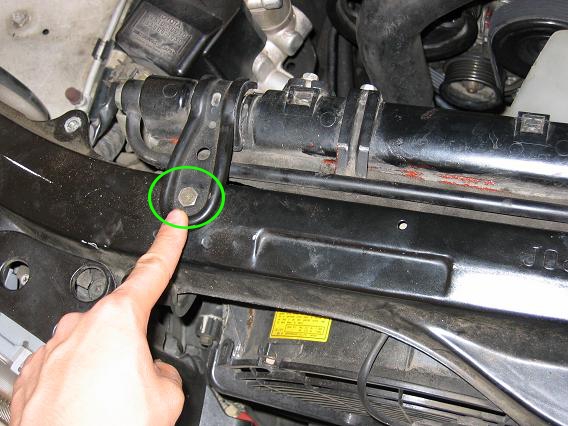
Remove this bolt and the one on the other side to remove the radiator, disconnect the 2 ATF hoses at the bottom of the radiator...then remove radiator. Your bolts are probally bigger because someone replaced mines with different bolts:
Remove fan clutch:
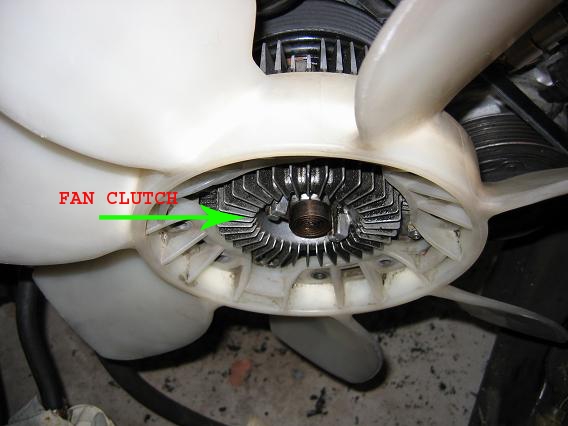
Remove fan clutch by loosening these 4 bolts behind it:
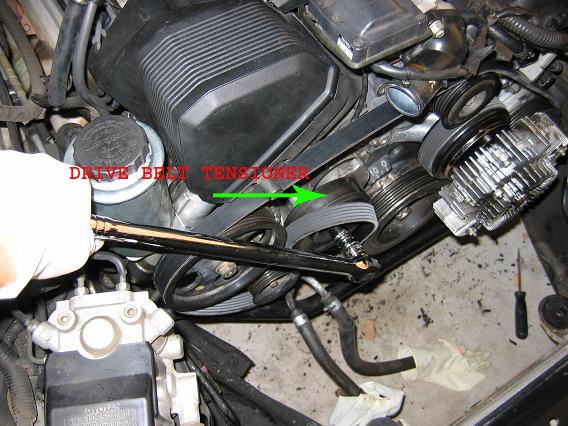
Remove drive belt by placing your socket over this bolt and turning it counter clockwise while using your other hand to guide the belt off:
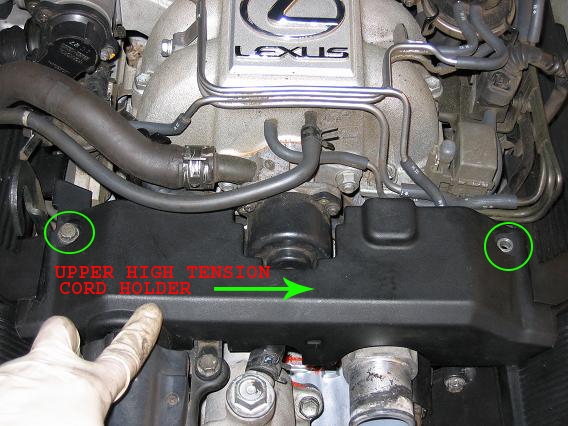
Remove upper high tension cord holder-(2)10mm bolts:
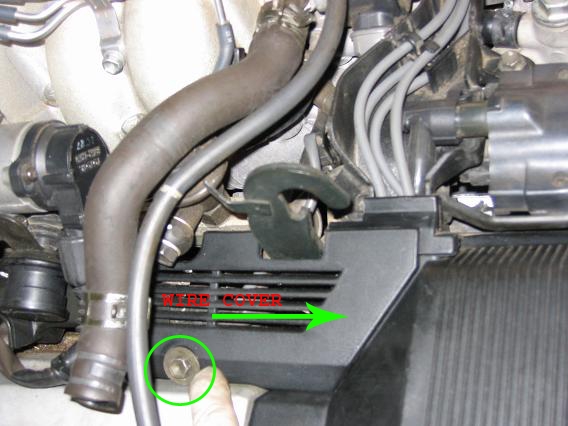
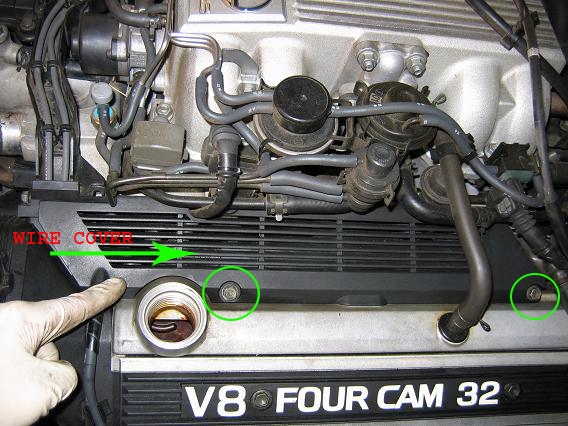
Remove right head engine wire cover-(1)10mm bolt:
Remove oil cap and (2)10mm bolts to remove left head engine wire cover:
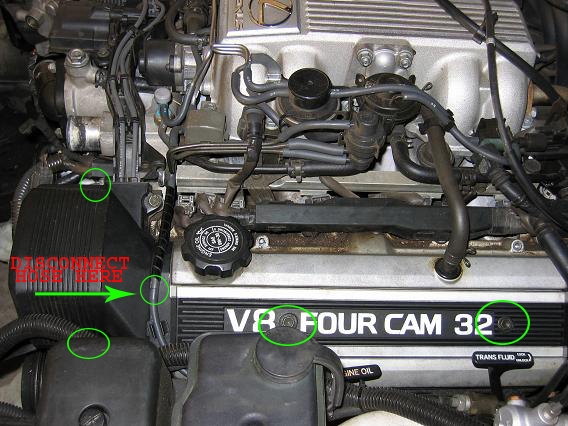
Disconnect the small vacuum hose, remove (4)10mm bolts to remove left head timing belt cover, then do the same for the right head timing belt cover:
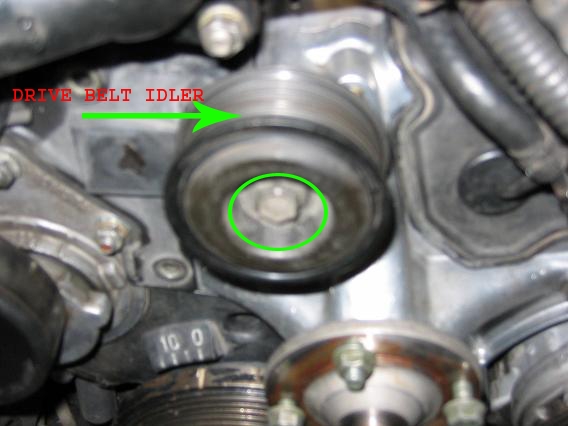
Remove drive belt idler pulley:
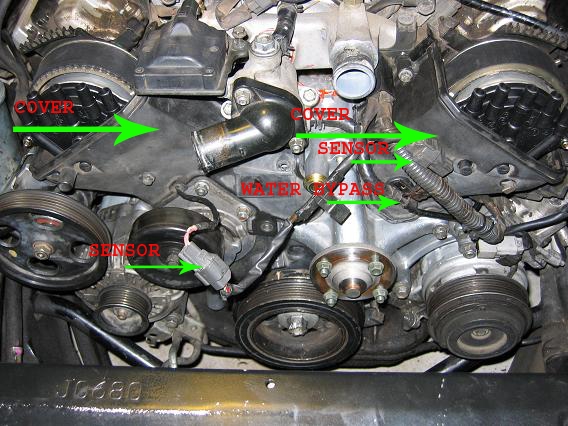
Locate 10mm and 12mm screws and remove them, then disconnect sensors, water bypass pipe then remove timing belt covers for right head and left head of engine (timing belt covers are the 2 plastic things covering half of the distributor caps):
Torque specs: 10mm-69in-lb 12mm-12ft-lb
Remove distributor caps (3)8mm screws:
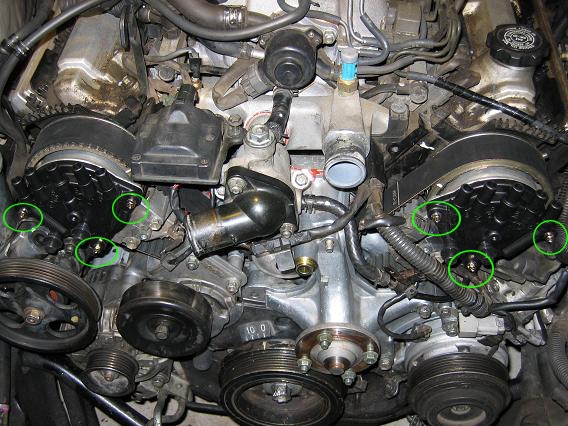
Torque specs: 34in-lb
Remove distributor rotors (2)8mm screws:
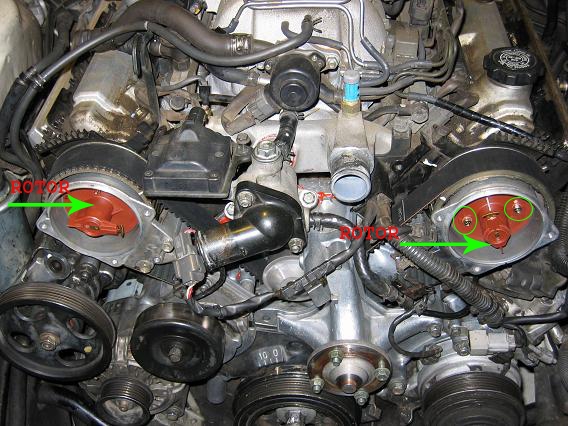
Torque specs: 34in-lb
Locate the (3)12mm bolts, disconnect the crank position sensor wire from each housing, then remove both distributor housings:
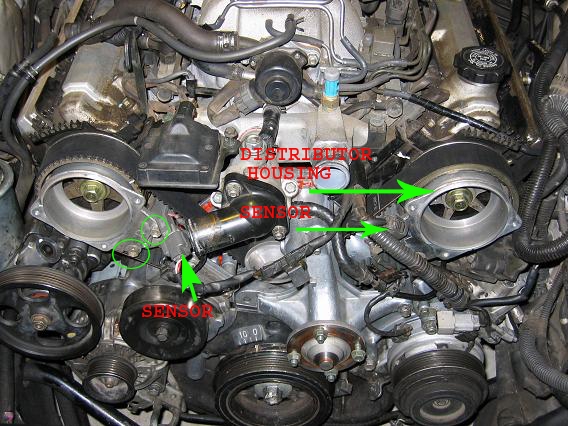
Torque specs: 13ft-lbs
Remove 14mm bolts and disconnect plugs to the alternator then remove it:
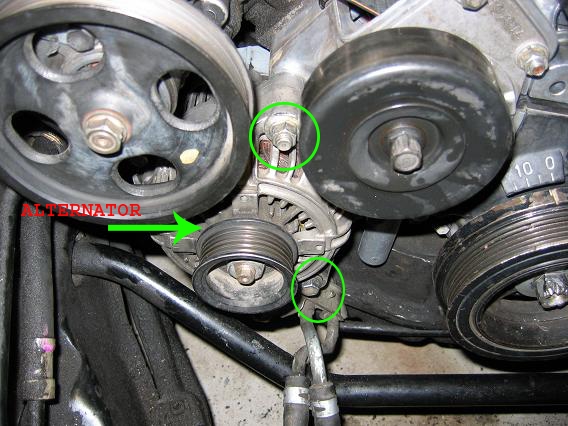
Torque specs: 26ft-lbs
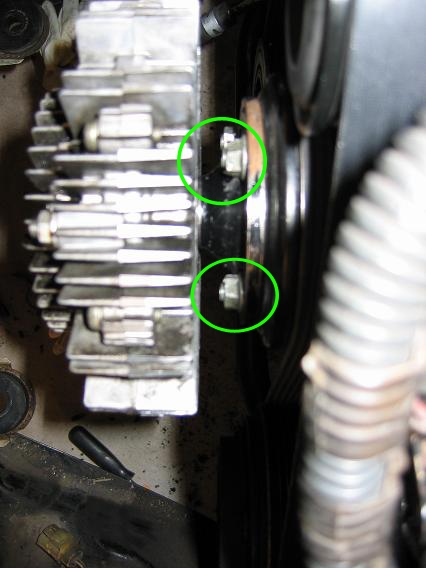
Remove drive belt tensioner (2)12mm bolts:

Torque specs: 12ft-lbs
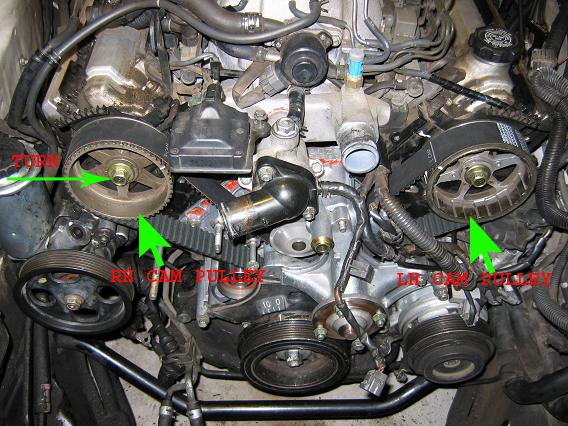
Set crankshaft pulley mark to the 0 mark like in the picture above, make sure the marks on your camshaft pulleys line up as well...then remove timing belt tensioner (2)12mm bolts:
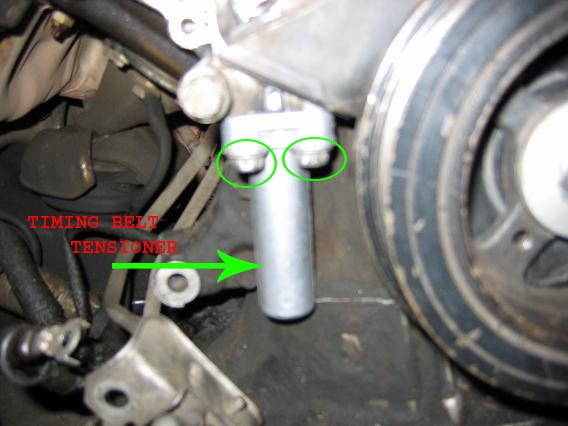
Torque specs: 12ft-lbs
Using a 14mm socket, slightly turn the right head camshaft pulley bolt clockwise to loosen the tension on the timing belt...then take the timing belt off of the camshaft pulleys:
Remove crankshaft pulley bolt (22mm), I used a breaker bar and braced it against the floor like in the picture...then cranked the motor for like a second to get the bolt loose:
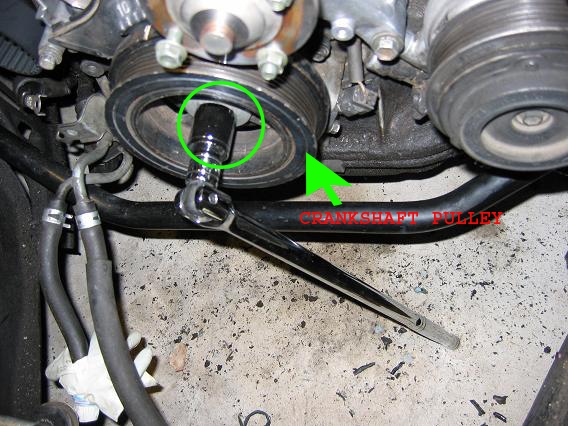
Torque specs: 181ft-lbs
Use the harmonic balancer pulley remover to remove the crankshaft pulley:

Remove fan bracket (4)bolts and (1)nut:
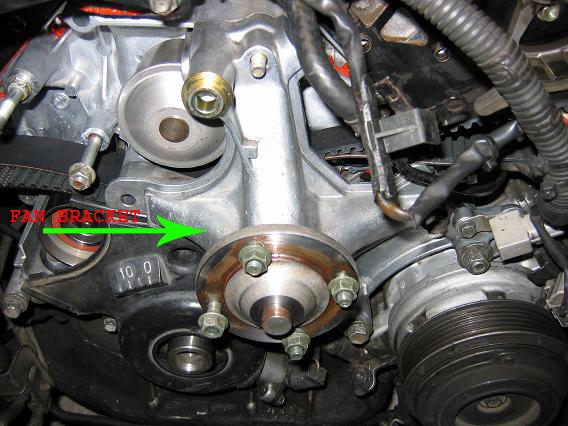
Torque specs: (12mm) 12ft-lbs (others) 22ft-lbs
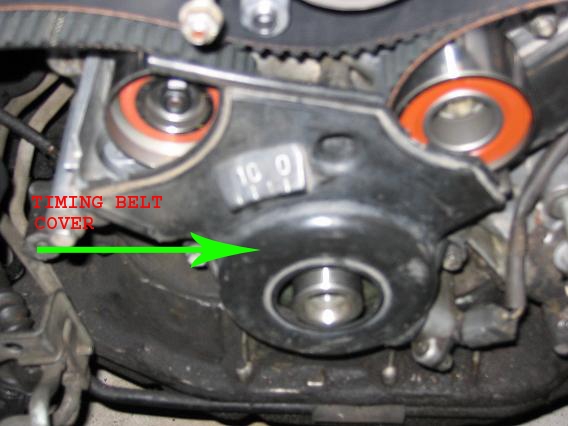
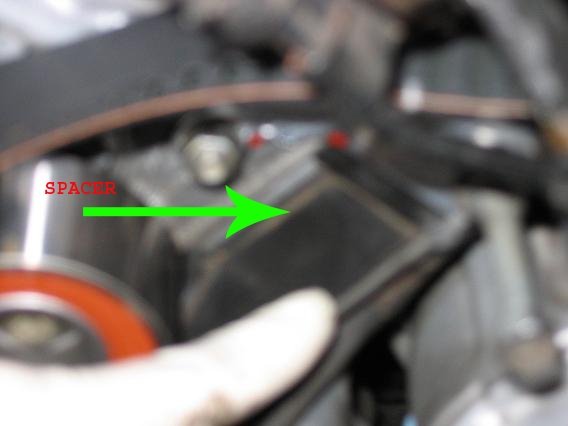
Remove timing belt cover and spacer (4)10mm bolts:
Spacer:
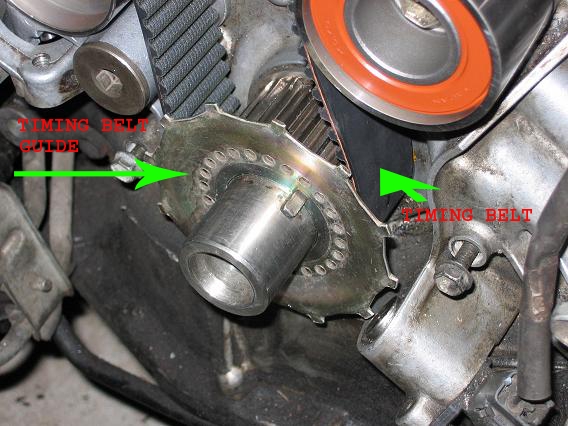
Remove timing belt guide, then remove the timing belt from the vehicle:
Remove idler pulley No.2 (1)14mm bolt:

Torque specs: 25ft-lbs
Remove idler pulley No.1 (1)10mm hex socket:
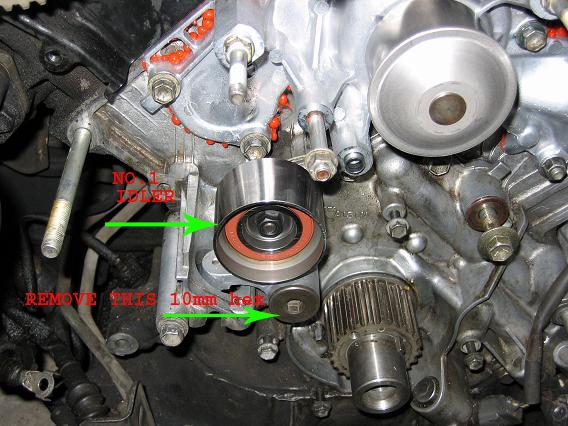
Torque specs: 25ft-lbs
If you're ONLY replacing the timing belt and not the water pump, then skip these next steps and scroll to down to the last step at the bottom of this page.
*Water Pump*
Remove right head ignition coil:
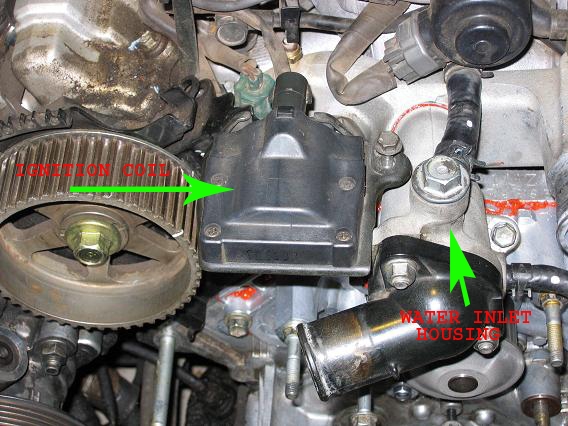
*Water Pump*
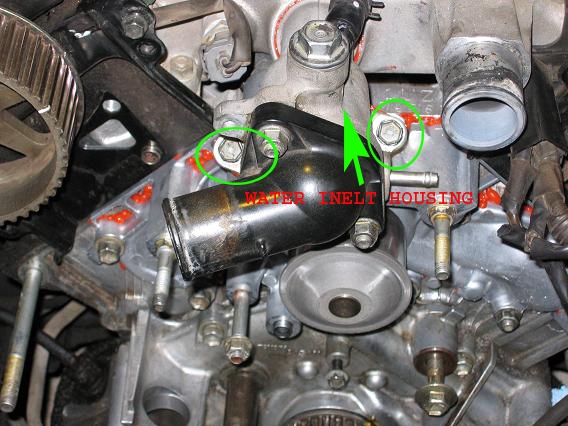
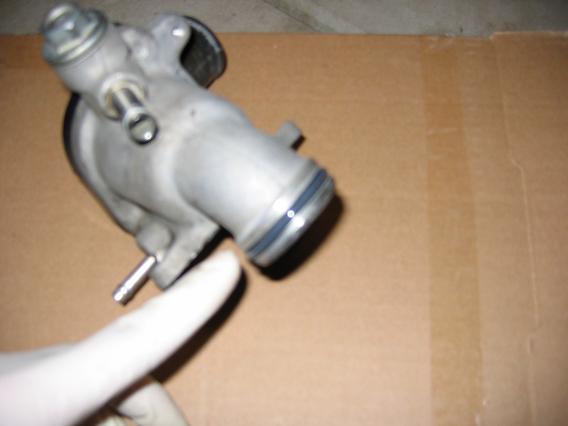
Remove water inlet housing (the housing that has the coolant filler bolt):
*Water Pump*
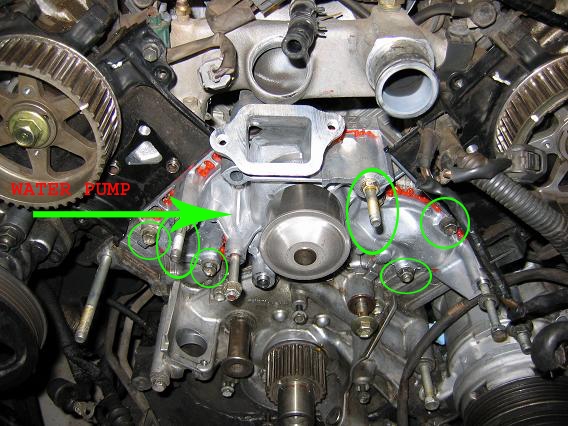
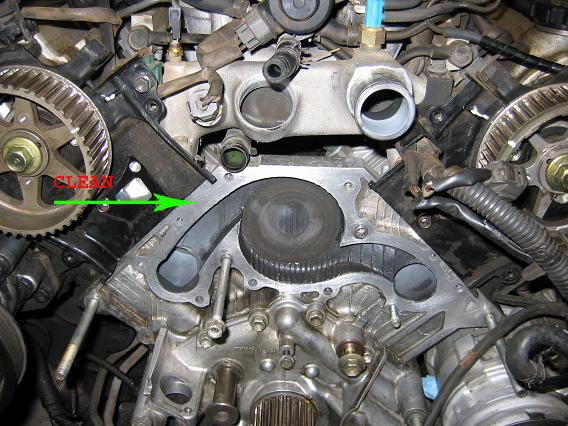
Remove water pump (5)12mm bolts (1)12mm nut...clean up all the old gasket material real good before mounting new water pump:
Water pump removed:
Put high temperature sealant on new water pump like so and remount:

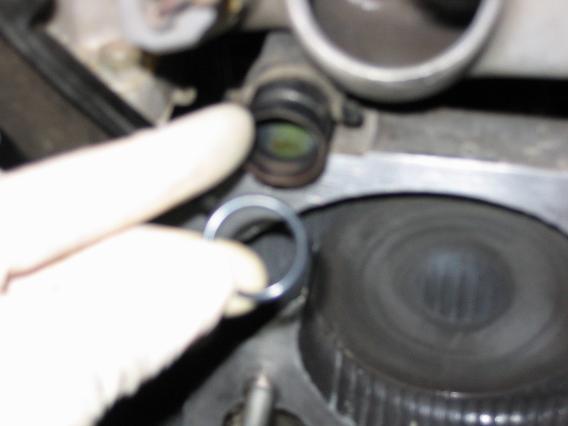
I replaced both of these gaskets...they came with the waterpump I purchased... then install in reverse order:
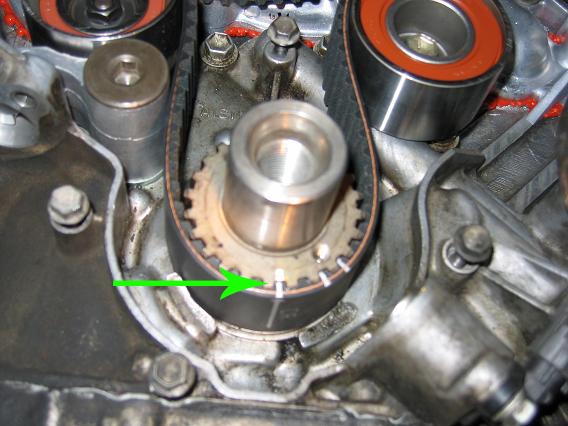
Then just install everything in the reverse order that you removed them...to make lining up your camshaft timing pulleys easier later, make sure the installation mark on the timing belt and crankshaft line up like this:
When installing the belt to the camshaft pulleys do the left head cam first, do the same with the right head cam then install the tensioner. Once you're done installing your timing belt, turn your crankshaft from TDC to TDC stopping on the "0" mark just to make sure your camshaft pulleys line up with the marks on the engine. Install everything in reverse then fill up with coolant and top off with ATF if needed.